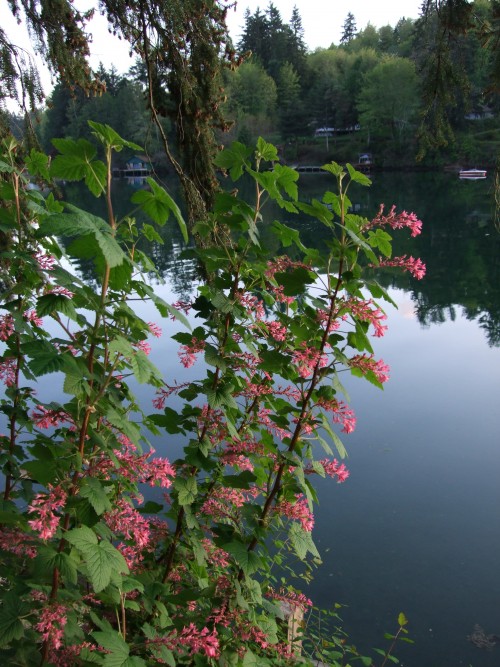
My Favorite Native Plant, Red-Flowering Currant, Ribes sanguineum at YMCA Camp Seymour..
What is a native plant? Native plants are plants that grew naturally in a region prior to possible introduction by settlers during territorial expansion. They were not brought here from other countries or regions either intentionally or accidentally. Depending on the scope of the discussion native plants can have a wide definition, including the entire United States or a narrower one including only those native to a particular region. For our purposes, we will concentrate mostly on those native to the northern Pacific Coast from sea level to the Cascade Mountain Range (northern Oregon, Washington, British Columbia and southern Alaska).
Why landscape with native plants? Native plants are better adapted to soils and climate. They usually require less irrigation and less maintenance. With some exceptions, native plants have fewer disease problems. Native plants attract native wildlife. Insects and other invertebrate pests become less of a control problem if there are enough birds, bats and snakes in your habitat to keep them under control. Native groundcovers can discourage the spread of invasive weeds. A natural landscape can also be left alone to regenerate itself through natural systems of pollination, seed dispersal and germination. Native Plants visually “fit” better in local landscapes than exotics; and can be used to create enchanting, woodland landscapes. Many are very attractive. Some native plants, such as the Red-Flowering Currant, have been reintroduced after cultivated varieties were developed in Europe.
If your goal is to improve the ecology of your landscape, then a large percentage, at least 80% or more, of it should be natives. It only makes sense to provide the food, cover and nesting plants with which local animals have co-evolved. Although some exotic plants may be highly attractive to animals, they are the “candy” that can be useful to entice them to check out your habitat. Whereas, the native plants are the “staples” that will keep the animals coming back or staying, including your habitat as part of their territory! You do not need to be a purist and can enjoy a few of your favorite exotics as long as they are not invasive or will otherwise ultimately cause problems. I usually like to plant my summer annuals in containers so they remain separate and easier to maintain.
Purchasing Native Plants: Many retail nurseries now sell some native plants, but they are often limited in the quantity and species available. It is best to find a nursery that specializes in growing and selling native plants. Because some native plants do not transplant well, you will have better success with smaller plants that have been grown in containers. A list of native plant nurseries can be found at the Washington Native Plant Society Website. Many nurseries have websites where they post what they grow and what is currently available, but it is best to call first to verify availability. A reputable nursery will only sell container-grown materials or will let you know if the plants were wild-collected legally with a permit. Many county conservation districts hold annual native plant sales, where larger quantities of small bareroot plants can be obtained relatively inexpensively.
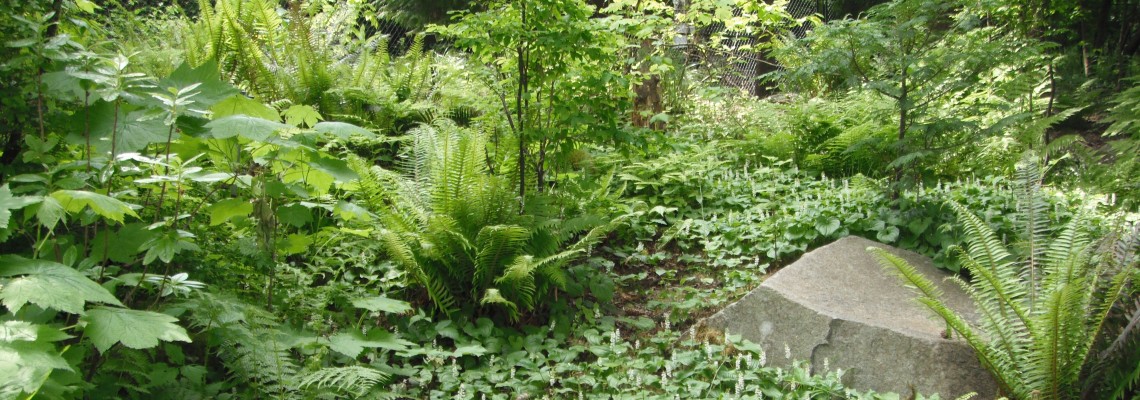
The Native Plant Garden at Point Defiance Park in Tacoma, Washington
Collecting Plants in the Wild: Before collecting plants in the wild it is important to get permission from the owners of the property. Plant collecting in National Parks is strictly prohibited (permits are issued only for educational or research purposes). In National Forests, you need to check with the local ranger to find out what can be collected and whether you need a permit. State parks generally have strict guidelines that, for the most part, only allow plant removal for maintenance purposes. Whenever collecting in the wild, it is important to be conscientious and only collect where large populations exist and collect only what you can use. The collecting of seeds or cuttings for propagation is preferred over digging the entire plant. Some plants, such as most of our native orchids, are better left alone. Because of complex symbiotic or semi-parasitic relationships, these plants will not survive transplantation. The best places to collect native plants are sites that are soon to be cleared for development. There are native plant salvage organizations that use volunteers to go in and rescue plants from these sites. It is a good way to claim some plants for your own landscape!
Seed collection and preparation: Seeds should be collected at the appropriate time, when pods, cones or fruit have ripened sufficiently. Pods, capsules or cones can be collected just before seeds are released– further drying will often cause them to open so the seeds are easily shaken out and collected. If the seed capsules are already open and still contain seeds, the seeds can be shaken into a bag. The preparation of seeds contained in fruit is more time-consuming. The fruit needs to be macerated (softened and mashed). Sometimes it helps to allow the fruit to begin to rot in a bag or to soak in water. To extract the seeds from the fruit, gently mash the fruit to separate the pulp from the seeds in a bowl of water. Most viable seeds will sink to the bottom and can be separated by swirling the pulp and water mixture and successive decantations, leaving the seeds on the bottom of the bowl. Some seeds, such as Salal, will float and even resist the surface tension of the water, and need to be skimmed off the surface of the water. (Sometimes it is easier just to mash the fruit and spread it, pulp and all, onto the growing media.) For some species, seeds from fruit should not be allowed to dry out but should be planted immediately or stratified as necessary. For plants that produce nuts, such as hazelnut, it is often difficult to find ripe nuts before squirrels or other animals. Sometimes nuts are produced that have no viable seed inside, therefore, before going to the trouble of planting these, the nuts should pass the “float test.” After placing the nuts in a pail of water, only plant the ones that sink to the bottom. You may crack a few open to check to make sure the test worked properly.
(This article was first published in the Peninsula Gateway on Sep 16, 2009)